Tag Archives: open source

[Not] Installing Moodle on DreamHost

Background

Moodle, as you may know, is an open-source Learning Management System (LMS). I first encountered it as many educators probably do — when being forced…er, encouraged to use it to build lessons and units for deploying with my students in the classroom.

Even without having to deal with the back end, I was not especially impressed. At my technology-focused school, it was no surprise that teachers would be encouraged to adopt EdTech, and I am no Luddite (well…I did have a phase). It’s just that, since getting all the kids onto working computers was nearly impossible and rendered irrelevant anyway by the unpredictable network, I just did not see the value in Moodle for me or my students.

I reckon I played with it longer than other teachers — a lesson or two — before tossing it aside.

My current employer does use Moodle, and in fairly non-traditional ways, which has given me additional exposure over the past several years. It’s still awkward and frustrating, but hey…it’s practically family.

So, long story short, I have wanted to install Moodle for some time on my server just to see how it goes, what challenges it presents, and if building a course or two is any fun at all.

I’ll be using and referring to this guide throughout the installation process:
https://docs.moodle.org/20/en/Installing_Moodle

Spoiler alert: if you’re serious about installing the latest Moodle on DreamHost, skip to the end.

The Files

Downloading Moodle as a .zip file was a breeze. The plan had been to un-pack the archive and copy everything with my handy-dandy FileZilla to my server. Then I saw how big the unpacked directories are: north of 130 mb. Since that would take close to forever, the plan now is to unzip them on the server itself. “Duh,” some techies will say. “Obviously.” Yes, thank you…but on my shared server space I don’t already have a user account with SSH access, and have successfully avoided making one so far.

Today is the day.

SSH

Enter the DreamHost wiki article on SSH. Today I learned that Windows does not have a native SSH client. Since firing up my OS X, Chrome OS, or Linux machines would just be cheating and the Chrome OS extensions are rumored to be problematic, I’m going to have to download PuTTY.

Just as I was about to create a new site user, I learned about DreamHost’s one user per domain policy, which seems to say that my brand new SSH user would be essentially powerless over my current domain directories and files. Instead, I upgraded my current user/owner to SSH privileges.

Now, skipping over the public and private key instructions in the PuTTY article on the wiki (which would allow for credential-less logins and probably be super-convenient when using SSH all the time), logging into my server is easy enough…

Unpacking

I uploaded the .zip file to a likely enough spot within the domain files on my server…not the right spot, but moving stuff around once uploaded is pretty trivial. Cobbling together the wikis, the DreamHost forums, and my own ancient knowledge of…um…DOS commands, I managed to issue the right unzip command to right folder. Success!

Well…I can’t see the /Moodle/ directory in FileZilla, but it’s there, plain as day, in SSH, with all the files inside. Sigh. When I visit mydomain.org/moodle, I get the set up screen, so I’ll plunge on ahead.

Setting up

I’ll need to create a a MySQL database, create and designate the data directory, and then hope everything was done correctly.

The database

I’m an old hand at this by now: new database, new database username and password. If all goes well, there will be no need to dive into this wild power user nonsense.

The data directory

This has the usual dire security warnings about where exactly the directory should go and how to set access permissions. In general, I find, the more dire the warning/security risk, the more difficult it is for an average layperson to know they are doing it right. Some hand-holding would be pretty nice right about now…

Moodle tries to provide a doc to make it clear, but the really important bits just repeat what is already in the installation guide. Time to cowboy up and try to not break all my stuff, I guess.

I went with a permissions set from the doc above and compared the file permissions to a data folder for another script that I think is probably set up correctly, and the result is similar. Not sure yet whether this will work, but the proof is in the pudding.

Interlude

This is the part of the installation process in which I select an appropriate adult beverage to keep the fires burning. A tip of the hat to the fine people of Atlas Brew Works in the greatest city on Earth!

Atlas Brew Works' Rowdy Rye Ale

This is also the part of the process in which I close some of the 21 tabs and six programs windows dedicated to getting Moodle up and running.

The Installer

Oh, how I love a good installer and being back in the work of a clean GUI. The installer asks to confirm the URL/location of the public-facing Web address for the Moodle site, the Moodle directory (with server username as part of the path), and the location of the data directory.

I then choose what kind of database I want (MySQL, with other options available).

Easy enough…specifying the database settings is where I usually mess something up, though. Host name, database name, user name and password are all easy enough, but Moodle wants me to specify a tables prefix, database port, and Unix socket.

Hmm. This is the part where I ignore what I don’t understand and keep moving.

And…holy cannoli! One is rarely so happy to see a copyright notice; I must have done something right!
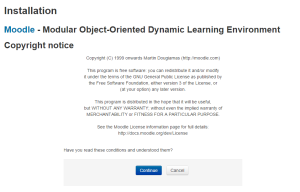
Moodle Installation copyright notice

Configuration

Well, that’s where it all falls down, of course.

(Slartibartfast, *The Hitchhiker’s Guide to the Galaxy*)

Moodle error: wrong MySQL version

Not with a bang, but a whimper: DreamHost has a woefully out-of-date MySQL version, which was being argued over in their forums more than a year ago. Many of the people clamoring for an update are current and would-be Moodle admins, as it happens.

And with that, I think I will finish my adult beverage and go to sleep. It would appear that, if I wish, I can install the not-long-for-this-world Moodle 2.6, hope and wish for a DreamHost upgrade, or, somewhat mysteriously, “contact support to be provided with other options.” Why do I get the feeling that “other options” include a higher payment tier? [EDIT: deep in the long forums thread is the information that, upon request, DH will move all of my stuff over to an experimental server in Irvine, CA. Nice to have, but more than I want.]

I fought the good fight, and I retire from the battlefield tireder, older, wiser, but not Moodler.


Images: Author – (1) Atlas Brew Works; (2) & (3) Moodle 2.9 Installer

An RSS feed reader of one’s own

Curating the Web

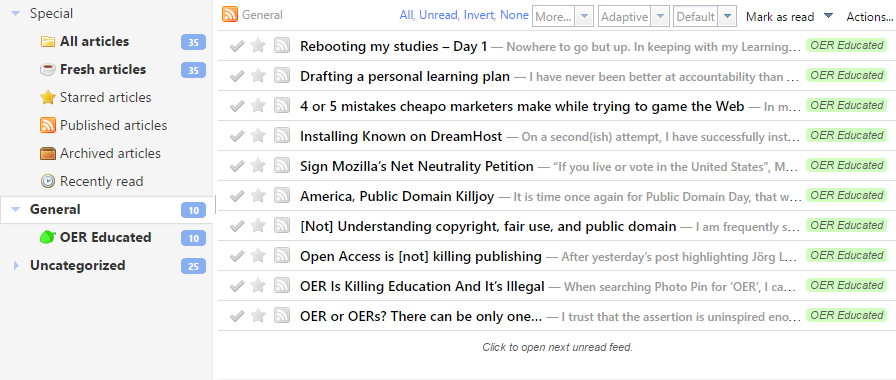
My project this Sunday — an easy enough one, as it turns out — was to install Tiny Tiny RSS on my DreamHost shared server.  Ta-da:

Tiny Tiny RSS at neonacorns

When you are trying to eat better, you can stack the deck in your favor by not having junk food easily available while purchasing healthful and convenient food — and finding ways to make it as easy as possible to choose the good stuff. Curating your pantry, if you will.

With the Web, avoiding “junk food” is comparatively more difficult, unless you want to lock down your browser. Curating good content, however, is not especially difficult at all; you can use tab groups, bookmark folders, shortcuts, and so forth. You can also use the trusty old feed reader.

I have used a number of readers both personally and professionally, including Google Reader (then Currents, then Newstand), The Old Reader, browser-based feeds, and even the TT-RSS Chrome extension. All of them have provided only limited success, because I never got into the habit of using them daily. Even so, I appreciate the utility of a good feed reader. As big, open, and discoverable as the Web is, if left purely to my own devices, I typically end up checking the same five or six sites. When I seem to run out of the good stuff, reaching for the bad stuff is a likely next step.

The choice of reader is important. Many modern readers focus on bright, beautiful tile displays . They are visually engaging, with a major focus on images. They are ideal for certain kinds of content, but when you need to be able to quickly scan a few dozen titles/headlines from different sources and determine what to read and what to leave behind, the utility of these photo-forward readers vanishes. That is why, as Google dropped its Reader and moved rapidly in the direction of a Feedly analogue, others have been hard at work resurrecting Reader in various guises, including The Old Reader.

For my latest attempt to curate my online life, I have chosen Tiny Tiny RSS, which has been around for a decade or so. It is clean, simple, and I have some existing familiarity with it. I also wanted something open source and installable on basic shared hosting, for two major reasons: (1) getting the thing up and running would be a fun project; (2) having an instance all my own might inspire greater attention and use.

Installing Tiny Tiny RSS on DreamHost

This turned out to be surprisingly easy, taking maybe 25 minutes from end-to-end, using this simple recipe:

Ingredients:

Steps:

  • I took the easy road from the installation notes and downloaded the master branch from GitHub as a .zip file, then unpacked it to a new directory.
  • I used FileZilla to created a new directory under my primary domain and FTP’ed all the TT-RSS files to that directory.
  • I created a new MySQL database and user via DreamHost.
  • I used the link provided in the install note to run the automated installer, which was able to access and initialize my database and spit out contents for a config.php file.
  • Given a choice, I elected to create my own new config.php file from the provided information.
  • The remainder of the directions deal with changing the admin password, creating a non-admin user for daily use, etc.

Navigating the preferences for Tiny Tiny RSS, like almost any software, takes some getting used to; the best way, in my opinion, is simply to click around and gradually become oriented. Simple Web and forums searches quickly solve specific problems.

And I did have one: attempts to save changed preferences were failing, behavior which did not occur in an incognito tab. It turns out that, as noted in the FAQ, one of my browser extenstions was causing some problems. Someone in the TT-RSS forums offered a simple solution, which worked just fine.

What now?

What now, indeed. Hopefully, I pull together a good a useful slate of feeds to keep my mind well-fed. Maybe I play with some of the included features such as the ability to “publish” articles in my feeds, which effectively nominates them for inclusion in a public RSS feed — basically, a public favorites list that could then, say, help to populate this blog, a “reading room”, or just feed into some other RSS client like Pocket or Google Newstand or whatever.

Time will tell.

Installing Known on DreamHost

On a second(ish) attempt, I have successfully installed Known to my own domain on a DreamHost server! My first attempt, late last year, was briefly noted in my post Learning by doing is…hard.

A few weeks ago, I took another look at the installation, hoping for more documentation or even a one-click install — which Ben from Known suggests is a future possibility (they seem really busy, so even getting a personal response to my email is hugely appreciated).

A new version was available, so I elected to delete everything in my server directories, and replaces the files with the unzipped new version. There they sat for some time as I worked up the energy and courage to have another go.

Today was the day! I want to emphasize that I consider myself very much a layperson; getting Known up and running on a shared server was far from obvious, but it was far from impossible, too. At the end of the day, everything I needed was available from just a couple webpages and with pretty simple tools.

The Known welcome screen
Such a welcome site, er, sight!


Installing Known on DreamHost

Pointing your browser to your Known instance’s URL brings up the auto-installer, the second page of which shows a list of requirements. Uh-oh — the installer can’t determine if I have Apache mod_rewrite installed, which allows for normal, human-readable URLs. This was also the case last year. Some Googling led me to suspect that creating the .htaccess file would solve this problem, so — as it my wont — I ignored this. The worst that could happen is another failed install!

Moving forward with the installation, I needed to create a fresh MySQL database (accomplished from my account panel at DreamHost) and enter some details in to the installer. This allows Known to create a config.ini file. I had to create a new directory named “Uploads” in the root of the Known installation and make sure that the permissions gave Write access to Group. Okay…directory created, permissions checked, database details entered, and…first major failure! Known could not connect to my database. User error on that one…I gave a bad name for my database. So I pulled up the config.ini file in Notepad++ and made the correction.

And…next major failure! Known can’t find the information it needs from my database.

Digging into Known’s developer docs provides the solution. The Known installer will not automatically provision the database. I had to go to the /schemas/mysql folder, download mysql.sql, and upload this to my database on the phpMyAdmin dashboard.

Refreshing the page allowed the installer to continue.

I also then created the .htaccess file by copying the contents of htaccess-2.4.dist and saving as .htaccess, placing this in the root of the installation.

Success! I created my admin user account and was off and running.

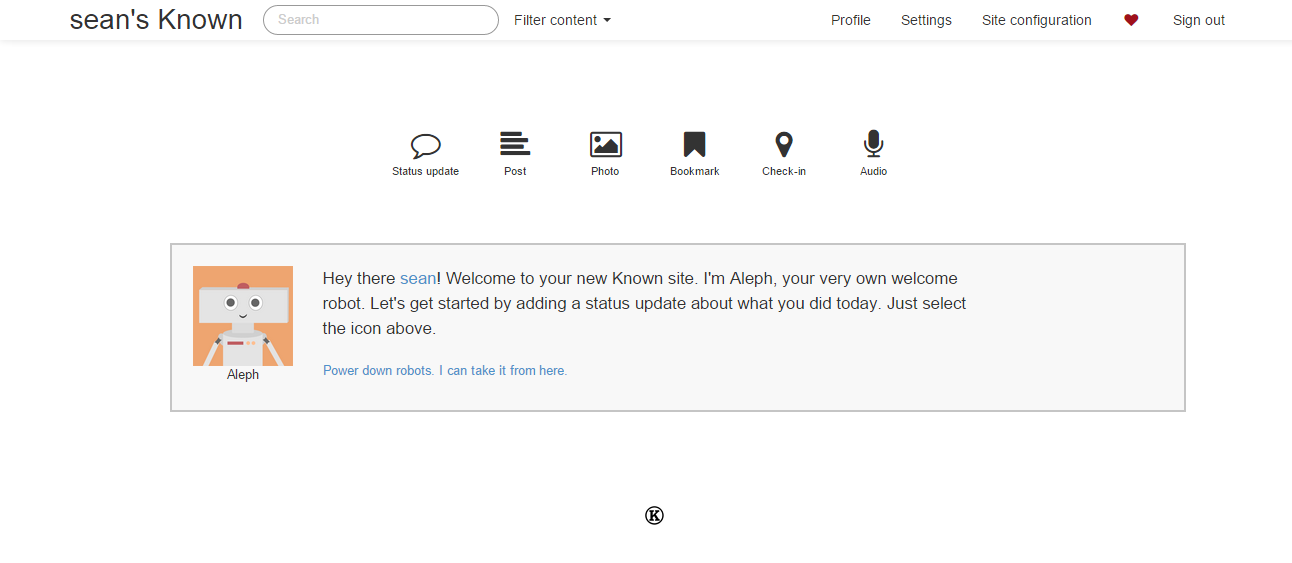
Welcome to your new Known site
A blank slate.

To summarize, here is what I had to do and the resources I used:

DreamHost

  • Created a subdomain for Known
  • Uploaded the latest Known files (available here)
  • Created a mySQL server host (hostname) and database

Files

  • Fix the config.ini created by the Known installer (because of my own error)
  • Create an .htaccess file that included the contents of the htaccess-2.4.dist file included in the installation files
  • Create a directory called /Uploads in the root of the Known instance and ensure that permissions included Group –> Write

Tools

  • Notepad++ with the FTP plugin (for easy editing and uploading of text files)
  • FileZilla (for easy browsing of the Known directories & files on my DreamHost server)
  • The Known installer
  • phpMyAdmin (for uploading the mysql.sql schema to my database)
  • Known developer docs, specifically:

That is pretty much it! Configuring my Known site involved some other fun, such as creating new Twitter and Facebook apps (not at all hard for the former, a little confusing for the later) and so forth.

The fruit of my labor is here: http://known.neonacorns.org

P.S. – Thank you, Erin and Ben, for your work, passion, curiosity, creativity, and general coolness. Getting my Known instance going was a personal challenge that I am proud to have completed successfully — thanks for that, too.

Learning by doing is…hard

After many, many months of playing with various ways to “roll your own” on the Web — including using Google Drive as a site host, installing a slew of open source scripts to my local machine, and running a few websites from my desktop for an audience of exactly one — I have taken the plunge into a hosted server environment.

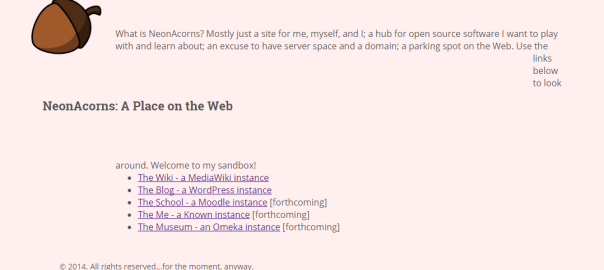
What a weekend. The image of the hand-coded index page reveals more of what I cannot do than of what I can. I managed to knock at least some of my server properties out of commission for still-mysterious reasons (but clearing the cache and refreshing the DNS entries at least did not make it worse, whether or not they helped). The past couple of days have held a lot of uncomfortable learning, which is simultaneously the very best and least welcome kind.

At least I accomplished the choosing of a server and the spinning up of this very WordPress blog. Advantages of the server company I chose include “unlimited” this-and-that, a “free” domain renewal each year, and especially monthly billing, so that I can throw in the towel any time I like. Disadvantages, however, include a relative dearth of one-click script installs, the benefits of which are quickly becoming evident.

Environment

  • One domain, two sub-domains (so far)
  • Apache, PHP…the usual — but no ability to customize the server environment because it is shared

Software

MediaWiki

This is the same software familiar to those who use Wikimedia properties. Configuration is a bit frustrated for a layperson, but using it as an end-user is easy enough. A Wiki is both simple and flexible; achieving that can result in alienating casual users, since “simple” does not necessarily mean “easy”. There is a reward on the other side, however.

WordPress

Still one of the best, and with Jetpack, even a self-hosted instance (like this one!) can take advantage of a bunch of quick integrations — social sharing, Markdown, basic stats, and so forth.

Known

After asking to be one of the Beta kids, and after receiving my invite, I promptly put off signing up until a couple of days ago. Known offers both free and paid accounts, but also is available as an open source script. My attempt to install it — and then trouble-shoot the installation — was unsuccessful, unfortunately; unlike both MediaWiki and WordPress, this script was not a supported one-click installation. Known is social networking that caters to the person rather than to the platform, encouraging both individual ownership and considered openness.

Moodle

Ah, Moodle. Almost as prickly on the back end as MediaWiki, and every bit as robust. I have run this on my local machine, but have yet to try for a proper installation.

Some things that make me sad:

Ghost runs on Node.js and is generally not supported in a shared server environment. Meanwhile, the hosted version offers no freemium. Ghost is a beautiful, elegant, simple, Markdown-driven blog platform, but one that eludes me. At least one WordPress theme mimics the front-facing glory of Ghost, if not the back-end joys, but, alas, does not quite offer the menu I want without PHP fiddling.

Some things that make me happy:

Markdown syntax in the WordPress editor? Nice! Moreover, users of Draft get a small win in being able to create WP posts and pages in the comfy Draft editor and send the content back to WP with a minimum of fuss.

Next up…

GitHub

To be learned!

Known

To be re-attempted!

Omeka

I am a curator without a collection…or am I?

PHP!

Clearly, I will never get anywhere without this…